
Outdoor Wood Fired Oven Building Workshop
May 27 - 28, 2000
Little Stream Bakery, Perth ON


A concrete pad was poured 3 days prior to the workshop. Concrete block base was built the next day and concrete sub hearth was poured. Little Stream Bakery is in the background.

Centre lines are marked out on the concrete sub hearth and the hearth is laid out. Useable hearth size is 32" X 36"

Hearth is set with 4.5" wide firebricks. A mortar bed of 1:1 fireclay:sand mortar is used. Dry joints are used between the firebrick. Firebricks are carefully levelled and nudged into place with a dead blow mallet.

Scott Miller, Chris Affre and Christoph Altehoefer put the finishing touches on the hearth.

The sidewalls are laid out dry and the mortar joints are marked. Recycled firebricks from an earlier Little Stream oven were used. 1/4" mortar joints were used to take up irregularities in the recycled bricks. New bricks could use thin fireclay mortar joints.

Side walls are in place, and back gable wall is up. Scott Miller washes the bricks.

Layout for arch template. Nail at bottom centre of arc and a string are used to establish the arc by trial and error until a whole number of bricks fits. Rise of the arch is 7" for a total vault height of 16" above the hearth.

Ron Karson lays up a course of skew bricks that will restrain the sides of the vault..
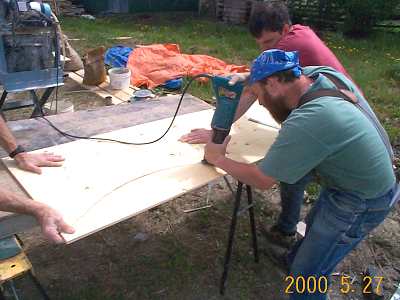
Chris Affre cuts out the arch template with a Sawzall. A jigsaw would work well also.

The arch form is nailed up.

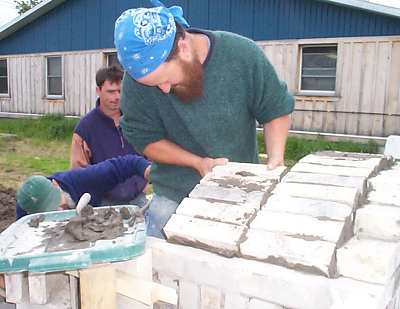
Instructor Norbert Senf lays up the front apron of the oven using clay bricks and regular brick mortar.


(Next Day): The course of skew bricks has cured. The sidewalls are temporarily braced to take up the side thrust of the vault.

The vault is started. Mortar mix is 1 part fireclay, 1 part calcium aluminate (fondue) cement.

View of the arch form. The vault is laid up one ring at a time. The form is removed and slid forward as soon as each ring is in place.

Mortar joints are filled in and the bricks washed before the next ring is started.
Chris Affre starts the next ring.

A 2x4 is used to temporarily hold the closure bricks in position.

Necking the vault down to the door opening. Five sets are laid as shown. (Centre): Workshop participant David Trithart.


The tricky part. Laying out bricks to close off the vault corner. Fit is by trial and error. We used a diamond wetsaw for cutting A skilsaw with an abrasive blade could be used also.

Completing the vault

Two layers of 6x6 reinforcing mesh are cut and bent into shape to cover the vault. The mesh is spaced 1" from the vault. The mesh is only in place temporarily at this point. Before the concrete cladding is poured, a layer of aluminum foil will be installed under the mesh as a bond break.

Plywood formwork for the concrete cladding (partially complete)

View of the mesh cage wired together. Temporary wood spacer behind mesh. Whole mesh cage lifts off easily as a single piece.

Update from April 21, 2001

Chris, Scott and David are members of the Potsdam Food Co-Op in Potsdam, NY. Here is a photo of the 4' X 6' oven that is almost completed for their new bakery.
No Comments